

This is a tote with matching gloves
The tote itself is simple, the case of this one I added clear plastic on top of the fabric and top stitched around the edge and added the vinyl on the bottom edge so it worked like one big piece of fabric.
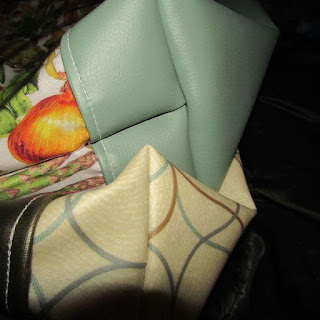
Vinyl bottom, clear plastic over fabric outside, vinyl handles and trim, plus vinyl inside.
-
pick fabric
- pick fabric

2. cut the fabric and the clear plastic the same size...

If you are making mask and gloves to match you can cut all out at the same time... sew you have cut pin sewing stages for all three... and when you are finished...all three are finished.
3.


4. pick your vinyl too, so you have all your supplies laid out. And make your gloves pattern. I use gloves for the door handles, cart handles, Post office buttons and kiosk screens.They are washable like the masks.

5 decide which mask you want to match...Olson or drawstring, both have filter pockets


You can add string to the Olson Mask by making a string casing next to the elastic. I call them hanger casings.
Drawstring Mask


6. Cut all pieces.
Gloves and mask if you want them
the front and back fabric for the tote, the size that you want- and the clear plastic the same size as the printed fabric.
Pin the clear plastic on top of the printed fabric and sew all around the edge to keep in place and sew as if one piece of material, while making the bag.
From now on I am using the vinyl for the outside bottom to make the bags more durable as the clear plastic after a few years will crack at the crease on the bottom and I love my bags.

For the outside you need a piece of vinyl for the bottom and cut a piece for the top trim of the bag and 2 pieces for handle straps whatever size you want. Another longer piece if you want to make a shoulder strap and for that you need two foldover tabs (rectangles) to hold the 4D rings on (2 Ds for each side).

You have folded your rectangular piece together wrong side out and sewn the side seams straight down

You have to sew across the bottom ends to create a squared bottom
Do this on both sides of ends and it will look like this

You can either cut a piece of vinyl the exact size of your original rectangle for the inside.

OR
Scraps sewn to the same size as outside rectangle

After sewing your vinyl scraps or just using vinyl you sew the same way as the outside and lay them side by side to make sure they are the same size.. the inside can be a smidgeon smaller but the edges after align at the top when you put them together


Turn the lining vinyl wrong side out and insert into the clear plastic bag with the vinyl bottom

Lining is bottom different then sides scrap vinyl


You cut a piece that is the width you need to cover the top-turn in for finished edge and then sew the ends together..
1. Fold it over the top by stitching on the inside over the topstitching and then
2. foldover pin and stitch on top of the topstitching on the outside to give you this effect


pin straps folded in for strength and top stitch leaving the bottom open for flat attachement.

The length is determined by how wide you want the handle attachment. If you are going to hold with your hand or want to put your arm through the handle.

Top stitch close to the edge of the strapping. Fold under the edges of the open bottom and top stitch like you did the top band of the bag. Then again you can use your topstitching as a guid for the attachment to the bag and just stitch over the top stitching.

Lay top stitched rectangle ends over the bag top and pin - then topstitch onto bag.
You can leave the ends of the rectangle open and you can use it as a pen holder and or business cards

OR
Using Poly or cotton straping you can do the support straping around the whole bag. I am just two cheap to do all my bags that way, but you can see that style

with D rings
You can also choose to add a shoulder strap with two D rings on each side that can be adjusted and or removed. Then you would need a piece the length of your should strap and two tab pieces to fold over the D rings to attach them to your bag sides at top.


No comments:
Post a Comment
Note: Only a member of this blog may post a comment.